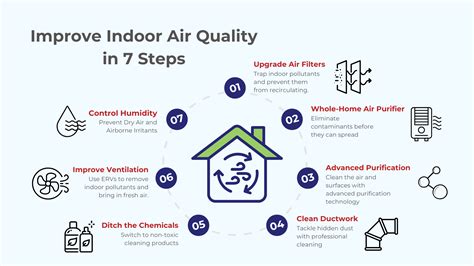
We spend up to 90% of our lives indoors, yet we rarely stop to think about the invisible cocktail of gases, dust, and microscopic particles we inhale daily. Finding simple ways to improve indoor air quality does not require a commercial-grade budget or an industrial overhaul. In fact, small, systematic adjustments to your daily routine can yield massive health dividends, reducing allergies, improving sleep, and boosting your daily focus. Let us design a step-by-step roadmap to transform your home into a sanctuary of clean, crisp air.
Mapping the Journey to Breathable Air
Before you rush to buy expensive air purifiers or rip out your carpeting, you need a clear, diagnostic plan of action. Improving your breathing environment is a structured journey, not a series of chaotic home adjustments. To make real, measurable progress, we must trace pollutants back to their origins, optimize our natural ventilation, and then apply targeted mechanical solutions to keep the space fresh.
Understanding that your home is a dynamic ecosystem—where air pressure, temperature, and human activities interact constantly—is the first major step toward lasting health and comfort.
By taking a systematic approach rather than throwing money at random gadgets, you prevent waste and ensure that your efforts target the actual sources of your indoor pollution. Let us look at the timeline of how you can execute this plan smoothly.
The Five-Phase Timeline for Cleaner Indoor Air
Achieving pristine air quality does not happen overnight, but you can see massive improvements by breaking the process down into manageable steps. Here is how you should structure your efforts over the next two months:
- Immediate Audit & Flush (Day 1): Open up the home, run exhaust fans, and identify obvious toxic chemical culprits.
- Source Elimination (Week 1): Swap out hazardous household products, vacuum thoroughly with a sealed system, and fix minor dampness spots.
- Active Filtration Upgrades (Weeks 2-3): Install high-efficiency filters in your central HVAC system and deploy dedicated air purifiers.
- Humidity and Moisture Control (Month 1): Run dehumidifiers or humidifiers to maintain optimal atmospheric balance to stop biological growth.
- Smart Automation Integration (Month 2+): Set up automated air monitors linked to smart plugs to maintain continuous purity without manual effort.
Phase 1: The Immediate Diagnostic Ventilation Push
Let us start at the very beginning of our timeline. Your first action must be to flush out stagnant air and establish a baseline. This is the fastest, cheapest way to get immediate relief from stagnant airborne particles.
Opening the Floodgates
Natural ventilation is the easiest way to dilute indoor pollutants. Even during cold weather, opening windows for just ten minutes can dramatically decrease the concentration of carbon dioxide (CO2) and volatile organic compounds (VOCs) that accumulate inside modern, tightly sealed homes.
- Create cross-ventilation by opening windows on opposite sides of your home to establish a strong breeze.
- Utilize kitchen and bathroom exhaust fans to actively pull moisture and cooking fumes outside.
- Keep interior doors open to encourage uniform air distribution across different rooms.
- Avoid using recirculating fans that simply blow dirty dust around without exchanging the air.
Quick Source Identification
Take an hour to walk through your home and smell the air. Strong artificial scents from air fresheners, synthetic candles, and aggressive cleaning supplies are immediate red flags. These items release chemicals that can irritate your respiratory tract, so your first step is to simply seal them up and put them away.
Phase 2: Eliminating Internal Pollutant Sources
Once the initial flush is complete, focus your energy on week one: source control. The United States Environmental Protection Agency (EPA) notes that controlling the source of pollution is always the most effective way to improve indoor air. Removing the source stops the problem before it starts.
- Switch from aerosol sprays to pump-style bottles or natural, unscented alternatives for personal care and cleaning.
- Store paints, solvents, and heavy automotive chemicals in an outdoor shed or detached garage instead of the basement or utility closet.
- Ditch synthetic paraffin candles in favor of beeswax or soy-based options with lead-free wicks.
- Implement a strict "no shoes inside" policy at your entryway to prevent tracking in pesticides, heavy metals, and street grime.
- Bathe and groom your pets weekly to catch shedding fur and dander before they settle into your carpets and furniture.
Phase 3: Deploying Active Mechanical Filtration
During weeks two and three, your goal is to trap the fine particulates that ventilation alone cannot remove. This phase is all about utilizing mechanical filtration systems to scrub the air constantly.
Air filters are rated using the MERV (Minimum Efficiency Reporting Value) scale, which ranges from 1 to 16. For residential homes, upgrading to a filter rated between MERV 11 and MERV 13 can capture pollen, mold spores, pet dander, and smoke without putting undue strain on your HVAC blower motor.
- Change your central HVAC air filters every 60 to 90 days, or monthly if you have multiple shedding pets.
- Deploy standalone True HEPA (High-Efficiency Particulate Air) filters in bedrooms and living rooms where you spend the most time.
- Ensure any air purifier you buy matches the Clean Air Delivery Rate (CADR) required for your specific room size.
- Avoid air purifiers that generate ozone, as ozone is a powerful lung irritant that can worsen asthma and allergies.
Phase 4: Balancing Humidity to Stop Biological Growth
By week four, you must address the moisture levels in your home. Relative humidity levels that are too high or too low directly degrade your health and the integrity of your living space.
Dust mites, mold spores, and mildew thrive when relative humidity exceeds 50%. Conversely, dry air (under 30%) can dry out your nasal passages, leaving you more vulnerable to respiratory infections. Aim to keep your indoor humidity levels between 30% and 50% year-round. You can measure this easily using a cheap digital hygrometer.
- Use a dehumidifier in naturally damp basements and crawlspaces to keep mold spores from colonizing wall cavities.
- Clean your humidifiers weekly to prevent them from dispersing mineral dust and bacteria into the air.
- Ensure your clothes dryer vents entirely outdoors and not into an attic or crawlspace.
Phase 5: Transitioning to Smart Air Quality Monitoring
As you enter month two, your clean air system should run on autopilot. This is where smart technology comes into play to help you maintain your hard-earned air purity.
Smart air quality monitors track particulate matter (PM2.5), total VOCs, humidity, and CO2 in real time. By understanding these metrics, you can automate your responses and eliminate guesswork. For example, you can link your air monitor to your smart home hub so that when PM2.5 levels rise during cooking, your air purifier automatically kicks into high gear.
- Place monitors at breathing height in the rooms where you spend the most continuous hours, such as the master bedroom or home office.
- Use the historical data from your monitor to identify hidden pollution triggers, such as cooking at high heat or vacuuming.
- Set up push notifications to remind you when it is time to open windows or replace filters.
Evaluating Your Air Quality Upgrade Strategy
To maximize your budget and energy, it is highly useful to compare the efficiency, cost, and primary targets of the different intervention types we have covered in our timeline.
| Intervention Type | Relative Cost | Primary Target Pollutants | Maintenance Effort |
|---|---|---|---|
| Source Control | Low to Moderate | VOCs, chemicals, toxins, dust | Low (behavioral changes) |
| Natural Ventilation | Free | Carbon Dioxide (CO2), odors, stale air | Low (seasonal adjustments) |
| HVAC MERV Upgrades | Low | Pollen, large dust, hair | Medium (replace every 90 days) |
| HEPA Air Purifiers | Moderate to High | PM2.5, smoke, viruses, fine dander | Medium (annual filter swaps) |
| Dehumidification | Moderate | Mold spores, dust mites, mildew | High (emptying water tanks) |
Sneaky Roadblocks That Sabotage Your IAQ Progress
Even with the best intentions, it is easy to make mistakes that completely undo your hard work. Keep an eye out for these common failure points throughout your timeline:
- Ignoring the Kitchen Range: Cooking on gas stoves releases nitrogen dioxide and carbon monoxide. Always run your exhaust hood, or open a window if your hood only recirculates air.
- Under-estimating Vacuum Exhaust: Cheap vacuum cleaners without HEPA filters simply blast fine dust particles back into your breathing zone.
- Neglecting Wet Bathmats: Soggy bathmats and damp towels are prime breeding grounds for mold spores that can easily become airborne.
- Using Ozone Generators: Some commercial devices claim to clean air with active ozone, but these can actually damage your lungs and react with household surfaces to create new pollutants.
Fast-Tracking Your Clean Air Results
If you are suffering from severe seasonal allergies or respiratory sensitivities, you may want to accelerate your timeline. You can jumpstart your results by taking a few aggressive, high-impact actions today.
First, professional carpet cleaning using low-moisture hot water extraction can pull years of deeply embedded allergens out of your flooring. Second, sealing air leaks between your living spaces and your garage or crawlspace prevents toxic fumes from seeping into your bedrooms.
- Upgrade to microfiber cleaning cloths, which trap dust electrostatically rather than scattering it like feather dusters.
- Wash your bedding weekly in water that is at least 130 degrees Fahrenheit to kill dust mites.
- Utilize high-efficiency vacuum bags that seal when removed to keep dust contained during disposal.
Keeping the Air Fresh for the Long Haul
Once you have completed your five-phase rollout, transition into a steady maintenance rhythm. Pristine air quality is not a one-time project; it is a habit of preservation.
To keep your system running optimally, establish a recurring calendar alert for routine upkeep. This prevents performance drops and ensures you are never surprised by a sudden spike in dust or allergens.
- Inspect your dryer vent and outdoor exhaust ports every six months to clear lint and debris.
- Schedule an annual professional inspection of your HVAC coils and ductwork to check for hidden moisture or mold.
- Deep clean your carpets and upholstery twice a year using non-toxic, fragrance-free solutions.
- Wipe down your walls and ceiling fan blades before the start of the summer and winter seasons.
The Surprising Role of Houseplants in Modern Homes
Many people buy houseplants hoping they will act as natural air purifiers. While plants look beautiful and can boost your mental well-being, their air-clearing capacity has been somewhat overstated in popular media.
The World Health Organization (WHO) highlights household pollution as a major health risk, but potted plants alone cannot keep up with high emissions. To replicate the filtration speed of a single mechanical air purifier, you would need to pack hundreds of plants into a single room. However, they do play a minor complementary role when managed correctly.
- Choose plants like Snake Plants, Spider Plants, or Peace Lilies, which are highly resilient and easy to maintain.
- Ensure you do not overwater your plants, as damp soil is a primary source of indoor mold and fungus gnats.
- Wipe dust off the leaves of your plants regularly so they can photosynthesize and transpire efficiently.
Navigating Pet Dander and Allergen Crises
For pet owners, keeping the air clean presents a unique, ongoing challenge. Pet dander consists of tiny, microscopic skin flakes shed by cats, dogs, rodents, and birds. Because it is incredibly light, dander can remain airborne for hours, easily sticking to walls, furniture, and clothing.
- Create designated pet-free zones, keeping your bedroom completely off-limits to pets to protect your sleeping environment.
- Brush your pets outside or in a well-ventilated bathroom to minimize loose fur flying through your living room.
- Use allergen-proof slipcovers on your mattresses and pillows to prevent pet dander from burrowing deep into your bedding.
- Mop hard floors frequently using a damp mop, which grabs pet hair more effectively than dry sweeping.
Seasonal IAQ Strategies for Extreme Weather
During times of extreme cold, blistering heat, or nearby wildfires, you cannot rely on simple natural ventilation. When outdoor air is highly polluted or excessively harsh, you must pivot to a closed-envelope strategy.
This means sealing your home tightly and relying strictly on internal recirculation and high-grade mechanical filtration. Running your central HVAC fan continuously—rather than on auto—keeps air circulating through your MERV 13 filter even when the heating or cooling elements are not running. Keeping your home safe during seasonal shifts requires being proactive and flexible with your ventilation tactics.