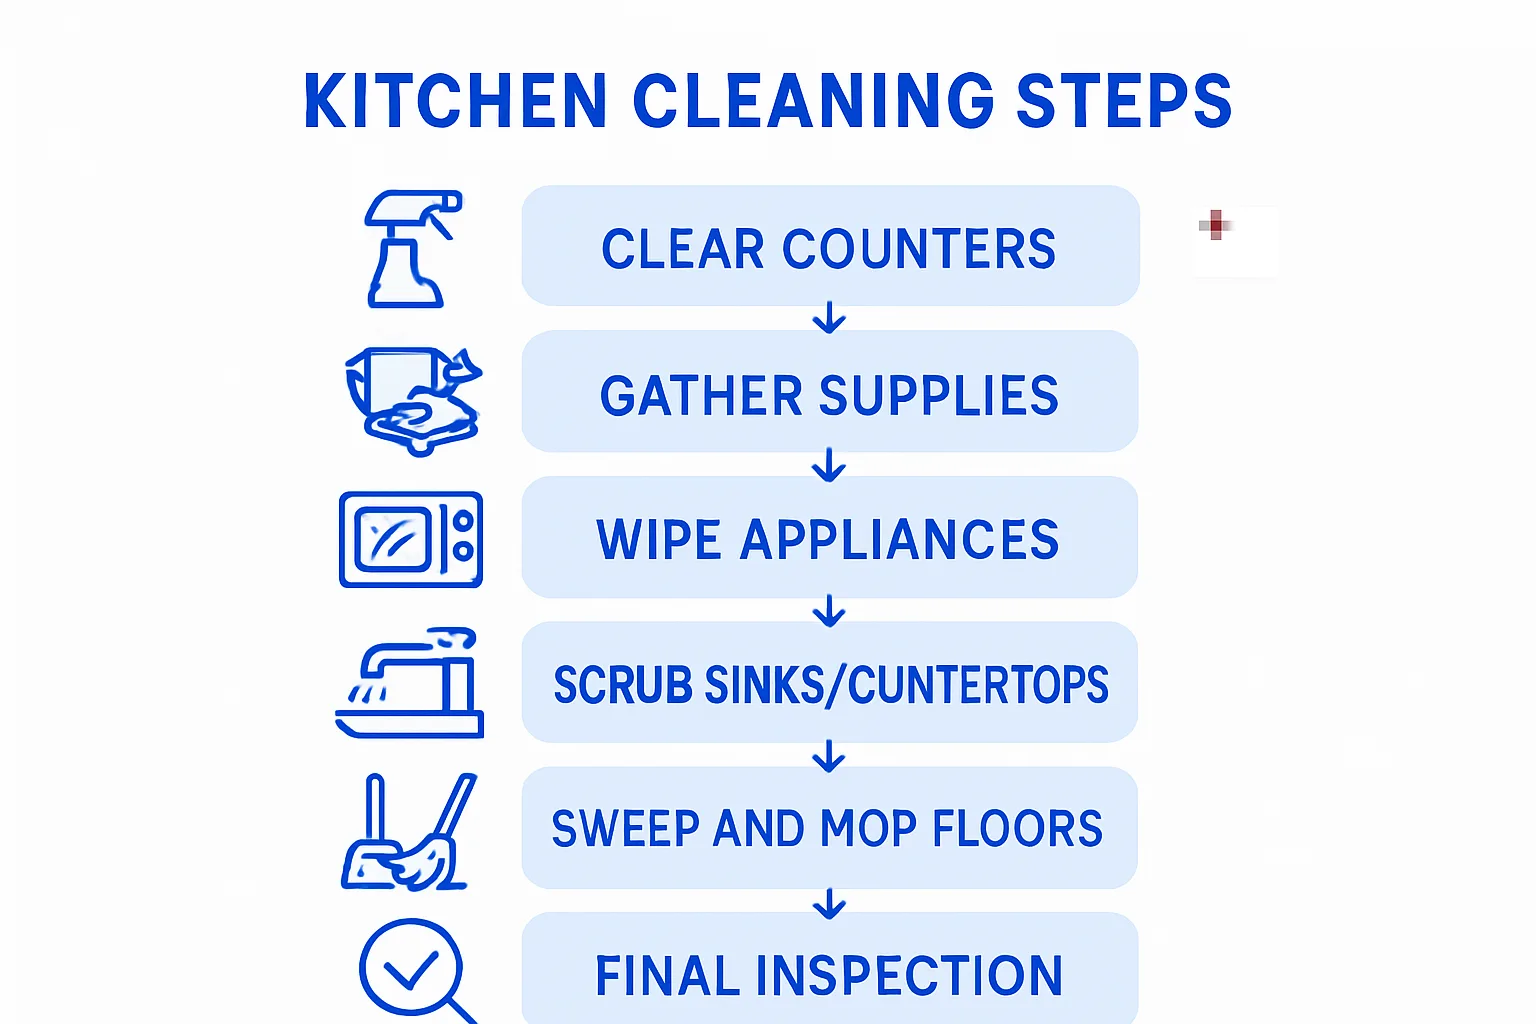
Ever walk into your kitchen and feel like it needs more than just a quick wipe-down? You're not alone. A kitchen is the heart of the home, but it's also a high-traffic zone that accumulates grease, grime, and forgotten spills. Learning how to deep clean your kitchen like a pro can revitalize your space, making it sparkle and feel truly fresh. It's a task that can seem daunting, but with the right strategy and tools, you can achieve impressive results that go far beyond surface-level cleanliness.
This isn't just about aesthetics; a deeply cleaned kitchen is a more hygienic and pleasant environment for cooking and gathering. From tackling stubborn oven grease to sanitizing cutting boards, we'll break down the process into manageable steps, answering key questions you might have along the way.
What Does 'Deep Cleaning' Actually Mean for a Kitchen?
When we talk about a "deep clean" versus a regular clean, what exactly are we implying? Is it just more elbow grease, or is there a fundamental difference in approach and scope?
A deep clean goes beyond the daily tidy-up. While a regular clean might involve wiping countertops and washing dishes, a deep clean is a meticulous, comprehensive attack on hidden grime, forgotten corners, and accumulated dirt that standard cleaning often misses. It means getting into every crevice, behind appliances, and inside cupboards, addressing buildup that has settled over weeks or months. Think of it as hitting the reset button for your entire culinary space.
- Surface vs. Sub-Surface: Regular cleaning targets visible dirt on accessible surfaces. Deep cleaning delves into hidden areas, behind appliances, and inside drawers, addressing not just dirt but also built-up grease, hardened food spills, and even dust bunnies that have taken residence.
- Sanitation Focus: Beyond just making things look clean, deep cleaning emphasizes sanitization. This means using appropriate cleaners to kill bacteria and germs in high-contact areas like sinks, cutting boards, and appliance handles, reducing the risk of cross-contamination.
- Detail-Oriented: It involves pulling out the toaster to clean underneath, scrubbing grout lines, degreasing range hoods, and descaling faucets. Every component, from light fixtures to floor edges, gets attention.
- Time Investment: Naturally, a deep clean requires a significant time commitment, often several hours or even a full day, compared to the 15-30 minutes of a routine clean. However, the results are long-lasting and make daily maintenance much easier.
Gathering Your Arsenal: What Tools and Supplies Are Essential?
Before you dive into the nitty-gritty, it's vital to ensure you have all the necessary equipment. Trying to deep clean without the right tools can be frustrating and less effective. What items should be on your checklist to make this process as smooth and efficient as possible?
Having the right arsenal of cleaning supplies and tools is half the battle won. You'll need a mix of general-purpose cleaners, specialized products for tough jobs, and a variety of scrubbing and wiping implements. Think about protective gear too, as some cleaners can be harsh on skin.
- All-Purpose Cleaner: A good quality, multi-surface cleaner for general wiping of countertops, cabinet exteriors, and splash zones.
- Degreaser: Essential for tackling sticky grease buildup on stovetops, range hoods, and cabinet surfaces near cooking areas.
- Disinfectant/Sanitizer: For killing germs on food prep surfaces, sinks, and appliance handles. A bleach solution or hydrogen peroxide-based cleaner works well.
- Glass Cleaner: For streak-free windows, mirrors, and appliance fronts.
- Oven Cleaner: A heavy-duty product specifically designed to break down baked-on food and grease inside your oven.
- Baking Soda and Vinegar: Natural, versatile cleaners for deodorizing, scrubbing, and descaling.
- Microfiber Cloths: Several of them, ideal for streak-free cleaning and absorbing spills without scratching surfaces. Designate different colors for different areas (e.g., blue for glass, green for general surfaces).
- Sponges and Scrub Brushes: Various types, including non-scratch scour pads for delicate surfaces and stiffer brushes for grout or tough spots.
- Bucket(s): For mixing cleaning solutions and rinsing cloths.
- Gloves: Protect your hands from harsh chemicals and hot water.
- Vacuum Cleaner with Attachments: For crumbs, dust, and reaching tight spaces.
- Mop and Floor Cleaner: Suitable for your specific kitchen flooring (tile, hardwood, laminate).
- Toothbrushes/Detail Brushes: For getting into tight corners, grout lines, and appliance crevices.
- Empty Spray Bottles: Handy for diluting concentrates or making your own cleaning solutions.
- Declutter and Clear Surfaces: Before any cleaning begins, remove everything from countertops, the stovetop, and the sink. Put away dishes, dispose of trash, and clear out any unnecessary items. This gives you a blank canvas.
- Empty Cabinets and Pantry (Optional but Recommended): For a true deep clean, empty out your cabinets and pantry. This allows you to wipe down shelves, check for expired items, and reorganize. Do one cabinet at a time to avoid chaos.
- Dust High Areas: Start by dusting light fixtures, the tops of cabinets, and any high shelves. Use a duster with an extendable handle or a microfiber cloth wrapped around a broom.
- Wipe Walls and Backsplashes: After dusting, tackle any splatters or marks on walls and backsplashes, working your way down.
- Initial Vacuuming: Do a quick pass with a vacuum cleaner to pick up loose crumbs and debris from the floor before it gets wet and sticky.
- Oven Cleaning:
- Pre-heat (if using chemical cleaner): Some oven cleaners recommend a slightly warm oven to enhance effectiveness. Always follow product instructions carefully.
- Remove Racks: Take out oven racks and soak them in a tub of hot, soapy water, or spray them with oven cleaner separately.
- Apply Oven Cleaner: Spray the interior of the oven liberally with a heavy-duty oven cleaner. Be sure to wear gloves and open windows for ventilation. Let it sit for the recommended time (often 2-4 hours, or even overnight for heavy buildup).
- Scrape and Wipe: After the waiting period, use a plastic scraper or stiff brush to remove loosened grime. Wipe thoroughly with wet cloths, rinsing them frequently, until all residue is gone. For a natural alternative, create a paste of baking soda and water, apply it, let it sit overnight, then scrub and wipe.
- Stovetop Cleaning:
- Remove Grates/Burners: Take off all removable parts. Soak grates and burner caps in hot, soapy water with a degreaser.
- Scrub Stovetop Surface: For gas stovetops, use a degreaser and a non-scratch scrub pad to clean the surface. For electric or induction cooktops, use a specialized ceramic cooktop cleaner and a soft cloth to avoid scratches.
- Detail Burner Areas: Use a toothbrush or small brush to clean around burner elements and in tight crevices.
- Rinse and Dry: Wipe down all parts with a damp cloth to remove cleaner residue, then dry thoroughly to prevent streaks and rust.
- Steam Clean: Place a microwave-safe bowl with 1 cup of water and 2 tablespoons of white vinegar (or a few lemon slices) inside. Heat on high for 5-10 minutes, or until the window steams up. Let it sit for another 5 minutes with the door closed to allow the steam to work its magic.
- Wipe Down: Carefully remove the bowl. The steam will have softened all the stuck-on food. Use a damp microfiber cloth to easily wipe away grime from the interior, turntable, and door.
- Exterior: Clean the exterior with an all-purpose cleaner, paying attention to the handle and control panel which are high-touch areas.
- Empty and Unplug: Remove all food items, discarding anything expired or questionable. Unplug the fridge to save energy and allow any icy buildup to soften slightly if needed.
- Remove Shelves and Drawers: Take out all removable shelves, drawers, and compartments. Wash these in warm, soapy water in your sink. For stubborn stains, a baking soda paste can work wonders. Rinse and dry thoroughly.
- Wipe Interior: Use a solution of warm water and mild dish soap, or a mixture of equal parts white vinegar and water, to wipe down all interior surfaces. Pay close attention to spills and sticky spots. For tough stains, let your cleaning solution sit for a few minutes before scrubbing.
- Deodorize: After cleaning, place an open box of baking soda or a bowl of activated charcoal inside to absorb any lingering odors.
- Exterior: Clean the exterior with an all-purpose cleaner. For stainless steel, use a specialized stainless steel cleaner and a microfiber cloth, wiping with the grain to prevent streaks. Don't forget the door seals – wipe them with a damp cloth to remove any mold or grime.
- Underneath/Behind: If possible, carefully pull the fridge away from the wall to vacuum dust and debris from the coils and floor. This improves efficiency and prevents fire hazards.
- Granite and Marble: These natural stones are porous and susceptible to etching from acidic cleaners. Use a pH-neutral stone cleaner or a mild soap and water solution. Always seal these countertops annually to protect them. Wipe thoroughly and dry immediately to prevent water spots.
- Laminate: Durable and non-porous. A general all-purpose cleaner works well. Avoid abrasive scrubbers that can scratch the surface. For tough stains, a paste of baking soda and water can be gently applied, then wiped away.
- Quartz: Engineered quartz is also non-porous and generally resistant to stains. Mild soap and water or an all-purpose cleaner are suitable. Avoid harsh chemicals or highly acidic/alkaline cleaners, which can dull the surface over time.
- Stainless Steel: While less common for entire countertops, stainless steel surfaces (like island tops or backsplashes) benefit from specialized stainless steel cleaners. Apply with a microfiber cloth and wipe with the grain to avoid streaks and bring out the shine.
- Tile and Grout: The tiles themselves can be cleaned with an all-purpose cleaner. For the grout, which tends to collect grime and can harbor mold, a dedicated grout cleaner or a paste of baking soda and hydrogen peroxide applied with a stiff brush or old toothbrush works wonders. Let it sit for a while before scrubbing and rinsing. Mold and mildew require specific attention for health reasons.
- Empty and Dust: For a deep clean, remove items from cabinets (or at least pull them forward). Dust the inside and outside of all cabinets and drawers, including the tops, where dust and grease often accumulate.
- Degrease (if applicable): For cabinets near the stovetop, a gentle degreaser (or a mixture of warm water and a few drops of dish soap) can be applied with a soft cloth. Work in small sections, wiping gently to avoid stripping the finish. For painted cabinets, be extra gentle.
- Wood Cabinets: Use a wood-friendly cleaner or a mixture of warm water and a small amount of mild dish soap. Wipe with the grain using a damp (not soaking wet) microfiber cloth. Immediately follow with a dry cloth to prevent water damage. You can then apply a wood polish or conditioner to restore shine and protect the wood.
- Laminate/Painted Cabinets: An all-purpose cleaner or a solution of warm water and mild dish soap is usually sufficient. Wipe down thoroughly and dry.
- Glass-Front Cabinets: Use a glass cleaner for the glass panes and an appropriate cleaner for the cabinet frame.
- Clean Hardware: Don't forget knobs and handles. These are high-touch areas. Wipe them down with an all-purpose cleaner or a disinfectant wipe. For stubborn grime, you might need to remove them and soak them in warm, soapy water before scrubbing with an old toothbrush.
- Wash Away Debris: Start by clearing any food particles from the sink basin. Rinse it thoroughly.
- Scrub the Basin: Use a scrub brush or sponge with an abrasive side and a strong kitchen cleaner (or baking soda paste for tougher stains) to scrub the entire sink basin, including the sides and around the faucet. For stainless steel, wipe with the grain.
- Sanitize: For a deeper clean, plug the sink and fill it with hot water, adding a cup of white vinegar or a few tablespoons of bleach (never mix bleach with vinegar!). Let it sit for 10-15 minutes, then drain.
- Faucet and Handles: Don't forget the faucet, handles, and sprayer. These harbor many germs. Scrub them with an old toothbrush and an all-purpose cleaner, then wipe clean. Descale mineral buildup around the faucet base with vinegar.
- Dry: Wipe the sink dry with a clean cloth to prevent water spots and keep it sparkling.
- Ice Cubes and Salt: Grind a cup of ice cubes mixed with a handful of rock salt (or coarse kosher salt). This helps dislodge food particles and scour the blades.
- Citrus Peels: Follow the ice with a handful of citrus peels (lemon, lime, orange). The oils help deodorize, and the peels further clean the interior.
- Baking Soda and Vinegar: Pour 1/2 cup of baking soda down the drain, followed by 1 cup of white vinegar. Let it fizz for 10-15 minutes, then flush with hot water. This helps break down grease and neutralize odors.
- Clean the Splash Guard: The rubber splash guard often collects grime. With the disposal off and unplugged (if you can safely do so), lift the rubber guard and scrub underneath it with a brush and soapy water.
- Clear the Area: Remove all chairs, rugs, and waste bins from the floor.
- Sweep or Vacuum: Thoroughly sweep or vacuum the entire floor to remove loose dirt, crumbs, and debris. Pay attention to corners and under appliances.
- Spot Treat Stains: Address any sticky spots or stubborn stains before general mopping. A concentrated cleaner or baking soda paste can work.
- Mop: Using the appropriate cleaner for your floor type, mop the entire floor. Work in sections, changing your water frequently if it becomes dirty. For tile, you might need to use a grout brush for extra scrubbing.
- Rinse (if needed): If your cleaner leaves a residue, go over the floor again with clean water.
- Dry: Allow the floor to air dry, or speed up the process with a clean, dry microfiber mop or cloth, especially for wood or laminate.
- Beneath and Behind Appliances: Pull out your refrigerator and oven (if safely possible) to vacuum dust bunnies, spilled food, and grime. This improves appliance efficiency and eliminates potential fire hazards.
- Ceiling Fan/Vents: Dust and degrease ceiling fan blades and exhaust fan grates. These collect airborne grease and dust, which can then recirculate.
- Light Fixtures: Wipe down light fixtures and clean light covers. They can become greasy and dusty, diminishing illumination.
- Window Sills and Blinds/Curtains: These collect dust, condensation, and cooking splatter. Wipe sills, dust blinds, or wash curtains.
- Trash Can: Not just emptying, but washing the inside and outside of the trash can with disinfectant. For a truly deep clean, take it outside and hose it down.
- Dishwasher Filter: Most modern dishwashers have a removable filter at the bottom. Consult your manual to locate and clean it regularly to prevent odors and improve washing performance.
- Small Appliances: Wipe down the toaster, coffee maker, stand mixer, and other small appliances. Don't forget their cords and the counter space directly beneath them.
- Cabinet and Drawer Interiors: If you emptied them earlier, wipe down all shelves and drawer bottoms. Consider adding shelf liners for easier future cleaning.
- Baseboards and Door Frames: These often get overlooked but can accumulate dust and scuff marks. Wipe them down.
- Behind the Sink: The area where the faucet meets the backsplash can accumulate mineral deposits and grime. Use an old toothbrush for these tight spots.
- Identify and Eliminate the Source: This is the most crucial step. Check:
- Garbage Disposal: As mentioned, ice, salt, and citrus peels, followed by baking soda and vinegar, are highly effective.
- Trash Can: Ensure the bin itself is clean and disinfected. Use a trash bag with odor control or sprinkle baking soda at the bottom.
- Refrigerator/Freezer: Discard expired food, wipe down surfaces, and place an open box of baking soda inside.
- Drains: Pour baking soda and vinegar down all kitchen drains (sink, dishwasher) to clear buildup.
- Spills: Check for forgotten spills in hard-to-reach places, like under appliances or inside cabinets.
- Dishwasher: Run an empty cycle with a cup of white vinegar on the top rack to descale and deodorize. Clean the filter.
- Natural Odor Absorbers:
- Baking Soda: A powerhouse for absorbing odors. Place open boxes in the fridge, pantry, or even hidden corners of the kitchen.
- Activated Charcoal: Highly effective at absorbing a wide range of odors. Place bowls of activated charcoal in various spots.
- Coffee Grounds: A small bowl of fresh or used (dried) coffee grounds can absorb odors and leave a pleasant aroma.
- Aromatics (Natural): Instead of synthetic air fresheners, simmer natural ingredients on the stovetop:
- Slice of lemon/orange, cinnamon sticks, cloves, and water.
- Fresh herbs like rosemary or mint.
- Ventilation: Regularly open windows and use your range hood while cooking and for a short time afterward to circulate air and remove cooking smells.
- Daily Habits:
- Wipe down countertops and stovetop after every meal.
- Wash dishes or load the dishwasher immediately.
- Wipe out the sink after each use to prevent water spots and buildup.
- Empty the trash can as needed, especially after cooking smelly foods.
- Do a quick sweep for crumbs on the floor.
- Weekly Habits:
- Clean the microwave interior and exterior.
- Wipe down appliance exteriors (refrigerator, dishwasher, oven door).
- Mop the kitchen floor.
- Clean the sink and faucet thoroughly, including the disposal (e.g., with citrus peels).
- Wipe down the outside of the trash can.
- Clean any small appliances (coffee maker, toaster) and under them.
- Monthly Checks:
- Wipe cabinet fronts.
- Clean the dishwasher filter.
- Spot clean walls and backsplashes.
- Give your fridge a quick wipe-down of shelves and drawers (without full emptying).
- The "Clean As You Go" Philosophy: This is perhaps the most effective habit. Wipe spills immediately, put away ingredients as you cook, and don't let dishes pile up. This minimizes the amount of work required at the end of the day.
- Preparation & Decluttering: 30 minutes - 1 hour (clearing surfaces, emptying bins, getting supplies).
- High Areas (Dusting, Lighting, Walls): 30 minutes - 1 hour.
- Oven & Stovetop (Active Cleaning Time): 1 - 2 hours (this doesn't include soaking/waiting time for oven cleaner).
- Refrigerator & Microwave: 1 - 1.5 hours (includes emptying, cleaning components, wiping).
- Cabinets & Drawers: 1 - 2 hours (includes emptying, wiping inside/out, hardware).
- Countertops & Backsplash: 30 minutes - 1 hour (scrubbing, sanitizing, grout).
- Sink & Disposal: 30 minutes - 45 minutes.
- Floors: 30 minutes - 1 hour (sweeping, mopping, spot treatment).
- Details & Finishing Touches: 30 minutes - 1 hour (baseboards, windowsills, small appliances, overall check).
- Time Constraints: If you simply don't have the 4-8 hours (or more) required for a thorough deep clean due to work, family, or other commitments.
- Extreme Grime and Neglect: For kitchens that have been severely neglected, or have years of baked-on grease and dirt that DIY methods might not fully resolve. Professionals can often achieve results that are hard to replicate without their tools.
- Moving In/Out: When you're moving into a new home and want a pristine, sanitized start, or when you're moving out and need to leave the kitchen spotless for a landlord or new owner.
- Specialized Cleaning: If you have unique or expensive materials (e.g., specialty stone, commercial-grade stainless steel) that require particular cleaning agents or techniques you're unsure about.
- Health or Mobility Issues: If physical limitations prevent you from comfortably performing the strenuous scrubbing, bending, and reaching required for a deep clean.
- Infrequent Cleaning: If you only plan to deep clean your kitchen once or twice a year, hiring a professional for these instances can be a more efficient use of your resources.
- Shine Stainless Steel: Use a dedicated stainless steel cleaner and a clean microfiber cloth. Wipe with the grain to achieve a streak-free, gleaming finish on appliances, sinks, and range hoods.
- Clean Windows and Mirrors: Use a glass cleaner for streak-free windows, glass cabinet doors, and any mirrors in your kitchen.
- Wipe Down Small Appliances: Give a final wipe to the toaster, coffee maker, blender, and other small appliances.
- Empty and Wash Waste Bins: Thoroughly clean and disinfect the inside and outside of your main kitchen trash can and any smaller bins. Replace with a fresh liner.
- Organize and Reset: Put back any items you removed from cabinets and countertops, arranging them neatly. Restock essentials like dish soap, hand soap, and fresh towels.
- Air Freshen: Open windows for a final airing out, or use natural deodorizers like a bowl of lemon peels or essential oil diffusers to leave a pleasant scent.
- Check Filters: Ensure your range hood filters are clean (some can go in the dishwasher). Clean or replace air filters in your HVAC system if they are kitchen-adjacent, as they can collect grease.
- Polish Faucets: A quick polish on chrome or stainless steel faucets can make a big difference in the overall sparkle.
What's the Smartest Starting Point for a Deep Clean?
Facing a full kitchen deep clean can feel overwhelming. Where do you even begin to ensure you don't miss anything and work efficiently? Is there a method to the madness?
The most effective strategy for any deep clean is to work from top to bottom, and from back to front. This prevents dirt and debris from falling onto already-cleaned surfaces. By clearing the space first, you gain better access and can identify areas that need extra attention.
How Do You Tackle Grease and Grime on Stovetops and Ovens?
The stovetop and oven are often the most challenging areas due to baked-on food and layers of grease. Many people dread cleaning them. What's the most effective way to cut through this stubborn buildup without endless scrubbing?
Conquering the grease and grime on your cooking appliances requires patience and the right products. The key is to let cleaners do most of the work for you, breaking down the tough deposits before you start scrubbing. Proper ventilation is also crucial when using strong oven cleaners.
What's the Secret to Sparkling Microwaves and Refrigerators?
These essential appliances often bear the brunt of everyday cooking, accumulating spills, food splatters, and sometimes even unpleasant odors. How can you get them truly sparkling clean inside and out without too much fuss?
Cleaning microwaves and refrigerators efficiently often comes down to pre-softening grime and using gentle yet effective techniques. The goal is to remove food residue, eliminate odors, and leave surfaces hygienic and shining. It's about combining steam for the microwave and meticulous wiping for the fridge.
Microwave Magic
For the microwave, steam is your best friend. It loosens dried-on food, making it incredibly easy to wipe away.
Refrigerator Refresh
The refrigerator requires a more methodical approach, often best done when it's relatively empty.
Beyond the Wipe: Deep Cleaning Countertops and Backsplashes
Countertops and backsplashes are constant workhorses in the kitchen, collecting spills, food particles, and grease. A simple wipe often isn't enough to remove ingrained dirt or sanitize effectively. What's the best approach to get them truly clean and hygienic?
Different countertop materials require different cleaning approaches to ensure they are not only clean but also protected. Understanding your material is key to choosing the right cleaner and technique. The goal is to remove stains, degrease, and sanitize without causing damage.
How Can You Restore the Luster to Kitchen Cabinets?
Kitchen cabinets are exposed to cooking fumes, grease, and fingerprints, often leading to a sticky film or dull appearance. Simply wiping them down might not cut through the built-up grime. What techniques and products are best for bringing them back to life?
"The secret to beautifully maintained cabinets lies not just in cleaning, but in understanding their material and using gentle, consistent care. Aggressive scrubbing can do more harm than good."
The approach to cleaning cabinets depends heavily on their material and finish. Always test any new cleaning solution in an inconspicuous area first. The goal is to remove grease and grime without damaging the finish or wood.
What's the Best Way to Sanitize Your Sink and Disposal?
The kitchen sink and garbage disposal are breeding grounds for bacteria and odors, despite appearing clean on the surface. How do you ensure these vital areas are truly sanitized and smell fresh?
Properly cleaning and sanitizing your sink and disposal is crucial for kitchen hygiene. It involves more than just rinsing; you need to eliminate food particles, break down grime, and kill bacteria that contribute to foul odors. Regular maintenance is key to preventing buildup.
Sink Sanitation
Disposal Deodorization & Cleaning
Conquering the Kitchen Floor: What Methods Work Best?
The kitchen floor endures spills, crumbs, and foot traffic, often becoming sticky and grimy. A quick sweep and mop might make it look okay, but a true deep clean requires more. What are the best strategies for thoroughly cleaning different types of kitchen flooring?
The key to a truly clean kitchen floor is understanding your floor type and using the appropriate cleaning solution and tools. Avoid oversaturating the floor, especially for wood or laminate, as this can cause damage. The process generally involves clearing, sweeping, cleaning, and then drying.
| Floor Type | Recommended Cleaner | Cleaning Method | Key Tip |
|---|---|---|---|
| Tile & Grout | Warm water + mild dish soap / Specific tile cleaner / Grout cleaner | Sweep/vacuum thoroughly. Mop with cleaning solution. For grout, apply cleaner, scrub with brush, rinse. | Use a stiff brush for grout lines. Ensure good ventilation for strong grout cleaners. |
| Hardwood | pH-neutral wood floor cleaner / Damp (not wet) cloth with water & vinegar (diluted) | Vacuum or sweep well. Use a spray mop or a barely damp mop with appropriate cleaner. Wipe dry immediately. | NEVER use excessive water or steam mops; they can damage wood. Always wipe dry. |
| Laminate | Laminate floor cleaner / Water + white vinegar (diluted) | Sweep/vacuum. Use a spray mop or a very lightly dampened microfiber mop. | Avoid harsh abrasives or too much water. Dry quickly to prevent swelling. |
| Vinyl/Linoleum | Warm water + mild dish soap / All-purpose floor cleaner | Sweep/vacuum. Mop with solution. For scuffs, use baking soda paste. | Generally durable, but avoid harsh scrubbers that can dull the finish. Rinse well. |
General Floor Cleaning Steps:
Which Hidden Nooks and Crannies Demand Your Attention?
It's easy to focus on the obvious surfaces, but a professional deep clean tackles the often-forgotten spots that accumulate surprising amounts of dirt. What are these sneaky areas that demand extra scrutiny during a comprehensive clean?
True deep cleaning is all about attention to detail. These overlooked areas can harbor dust, grease, and even pests if neglected. Incorporating them into your routine will make a significant difference in the overall cleanliness and hygiene of your kitchen.
How Do You Banish Persistent Kitchen Odors Effectively?
Even after a thorough clean, some kitchens can retain a lingering, stale smell that isn't quite pleasant. How can you effectively eliminate these persistent odors and leave your kitchen smelling truly fresh, not just masked?
Persistent kitchen odors often come from hidden sources, lingering food particles, or mold. True odor elimination goes beyond spraying air fresheners; it involves identifying the source and neutralizing it. A combination of cleaning and natural deodorizers is usually the most effective approach.
What Are the Key Habits for Maintaining a Deeply Clean Kitchen?
A deep clean is a significant effort, and you certainly don't want to redo it too soon. What daily and weekly habits can you adopt to keep your kitchen looking pristine and extend the freshness of your deep clean?
Maintaining a clean kitchen is about consistency, not intense effort. By incorporating small, manageable tasks into your daily and weekly routine, you can prevent grime from building up and drastically reduce the frequency of needing another full deep clean. It's about proactive care.
How Much Time Should You Allocate for a Pro-Level Deep Clean?
Undertaking a full kitchen deep clean isn't a five-minute job. Realistically, how much time should you set aside to achieve those professional-level results without feeling rushed or overwhelmed?
The time required for a professional-level kitchen deep clean varies significantly based on the size of your kitchen, the level of accumulated grime, and how many people are helping. However, preparing for a substantial time investment is wise to avoid cutting corners. For a typical kitchen, you should plan for several hours, broken down strategically.
A good rule of thumb is to allocate between **4 to 8 hours** for a thorough deep clean of an average-sized kitchen by one person. Here's a rough breakdown of how that time might be spent:
Consider breaking the task into smaller chunks over a weekend if you don't have a solid block of time. For instance, tackle the oven one evening, appliances another day, and floors on a third. This makes the project less daunting.
When is it Smarter to Hire a Professional Kitchen Cleaner?
While DIY deep cleaning can be incredibly rewarding, there are times when the job might be too big, too complex, or simply beyond your capacity. When does it make more sense to call in the professionals rather than tackling it yourself?
Knowing your limits is a sign of wisdom. Professional cleaners have specialized equipment, industrial-grade products, and extensive experience with tough cleaning challenges. Deciding to hire a professional can save you time, effort, and ensure a superior result in specific circumstances.
Professional cleaning services can provide a level of expertise and efficiency that DIY efforts sometimes can't match, especially when dealing with significant challenges. They also come equipped with heavy-duty steam cleaners, specialized vacuums, and powerful but safe chemicals that aren't readily available to the average consumer. Understanding the scope of professional cleaning services can help you make an informed decision.
Deep Cleaning Checkpoint: Quick Reference Guide
As you work through your kitchen, it's helpful to have a quick summary of the key actions for major areas. This table provides a concise overview to keep you on track.
| Kitchen Zone | Primary Challenge | Key Solution/Method | Tool Spotlight |
|---|---|---|---|
| Oven & Stovetop | Baked-on grease, carbonization | Heavy-duty oven cleaner / Degreaser + patience | Oven cleaner, scraper, stiff brush |
| Refrigerator | Expired food, spills, odors | Empty, wash shelves, baking soda | Mild soap, microfiber cloths, baking soda |
| Microwave | Splatter, dried food | Steam clean with vinegar/lemon | Microwave-safe bowl, microfiber cloth |
| Countertops | Food stains, sanitization | Material-appropriate cleaner, sanitize | pH-neutral cleaner, scrub pad |
| Cabinets | Grease film, fingerprints | Degreaser (gentle), wood polish | Soft cloths, wood cleaner/polish |
| Sink & Disposal | Bacteria, odors, grime | Scrub, sanitize, ice/citrus in disposal | Abrasive sponge, brush, baking soda |
| Floors | Dirt, spills, scuffs | Vacuum, mop with specific cleaner | Vacuum, mop, floor cleaner |
| Hidden Areas | Dust, forgotten grime | Pull out appliances, detail clean | Vacuum attachments, detail brushes |
The Last Touches: Ensuring a Pristine Finish
After all that hard work, the final steps are about making your kitchen not just clean, but truly pristine and inviting. What are the often-overlooked details that give your kitchen that professionally cleaned look and feel?
These finishing touches are what elevate a simply clean kitchen to a professionally deep-cleaned one. They make the space feel truly complete, fresh, and welcoming, ensuring that your hard work shines through in every detail.